Profiles Management
This feature allows an administrator to manage all user profiles in the application. It provides a full CRUD interface to create, view, update, and delete any profile in the system.
Profiles Listing
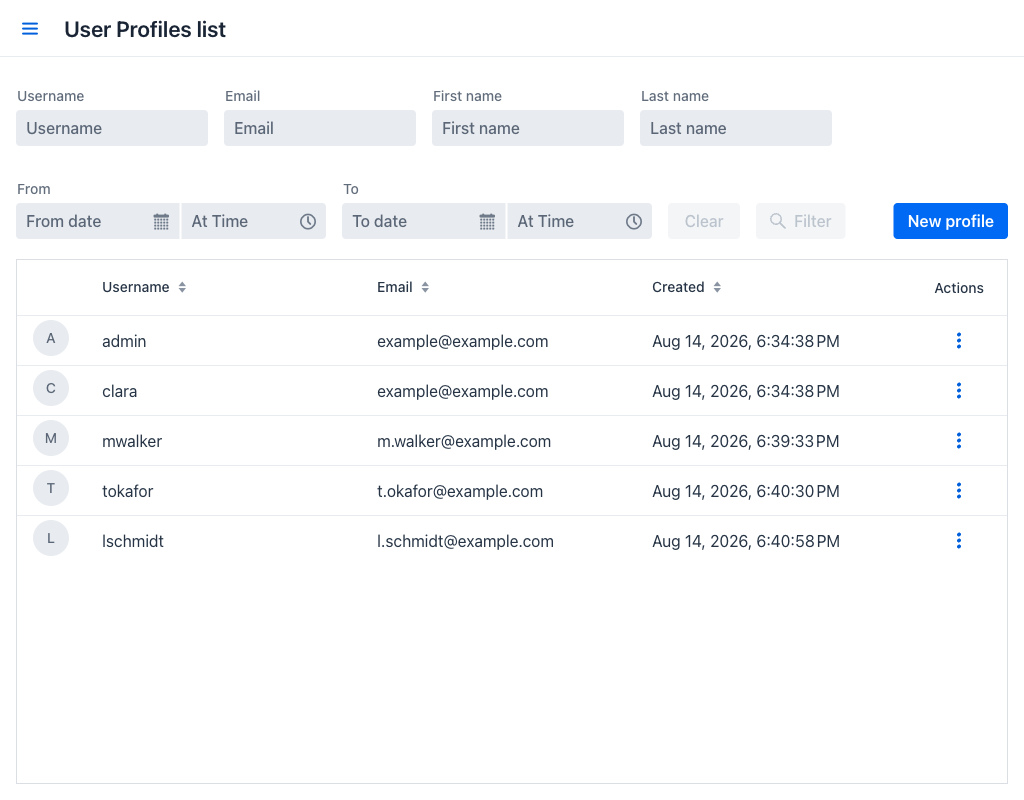
When entering the view, a listing is displayed showing all available profiles along with filter controls to narrow down results.
Filters
The following fields are available to filter the profiles displayed in the grid:
- Username: Filters profiles whose username contains the entered text. For example, entering
"john"will display both"john"and"johndoe". - First Name: Filters profiles whose first name contains the entered text.
- Last Name: Filters profiles whose last name contains the entered text.
- Email: Filters profiles whose email address contains the entered text.
- From / To: A date and time range filter. Only profiles created within the specified range will be shown. When a date is selected without specifying a time, the start of that day (
00:00:00) is used as the default. Either end can be left empty, in which case the range is open on that side.
The four text filters ignore case and match anywhere in the value, so "DOE" and "doe" return the same profiles.
The Filter button becomes active as soon as any filter field has a value. Clicking Clear resets all filters and refreshes the grid.
In the filter area, at the right, there is a New profile button. Clicking it opens the profile creation dialog.
Profiles Grid
Below the filter area, a grid displays the matching profiles with the following columns:
- Avatar: A circular thumbnail of the profile picture. When no picture is set, the first letter of the username is shown.
- Username: The username associated with the profile.
- Email: The email address stored in the profile.
- Created: The date and time when the profile was created, rendered in the time zone of the browser.
- Actions: A menu button that opens the actions available for that row.
The Username, Email and Created columns are sortable, and every column can be resized. When no profile matches the applied filters, the grid is replaced by a No profiles found message.
Clicking a row expands a details panel underneath it, repeating the Email and Created values of that profile. This keeps the information reachable on narrow screens, where those two columns are hidden.
Actions
The actions that can be performed on each of the rows are the following:
- Edit: Opens the profile edition dialog for that row.
- Delete: Opens the deletion confirmation dialog.
The same two actions are also available by right-clicking anywhere on a row. In free mode, Edit is disabled when the number of profiles exceeds the free allowance; Delete is never restricted.
Small Screens
The view adapts to the width of the browser:
- On a phone, the filter fields move into a dialog opened by a Filter button, and the grid shows only the Avatar, Username and Actions columns. New profile stays beside the Filter button.
- On a tablet held in portrait, all the filters remain on the page and the Avatar column is hidden.
- On a tablet held in landscape and on larger screens, every filter and every column is shown.
Profile Creation
To add a new profile, click the New profile button in the upper right area. This opens the Create profile dialog.
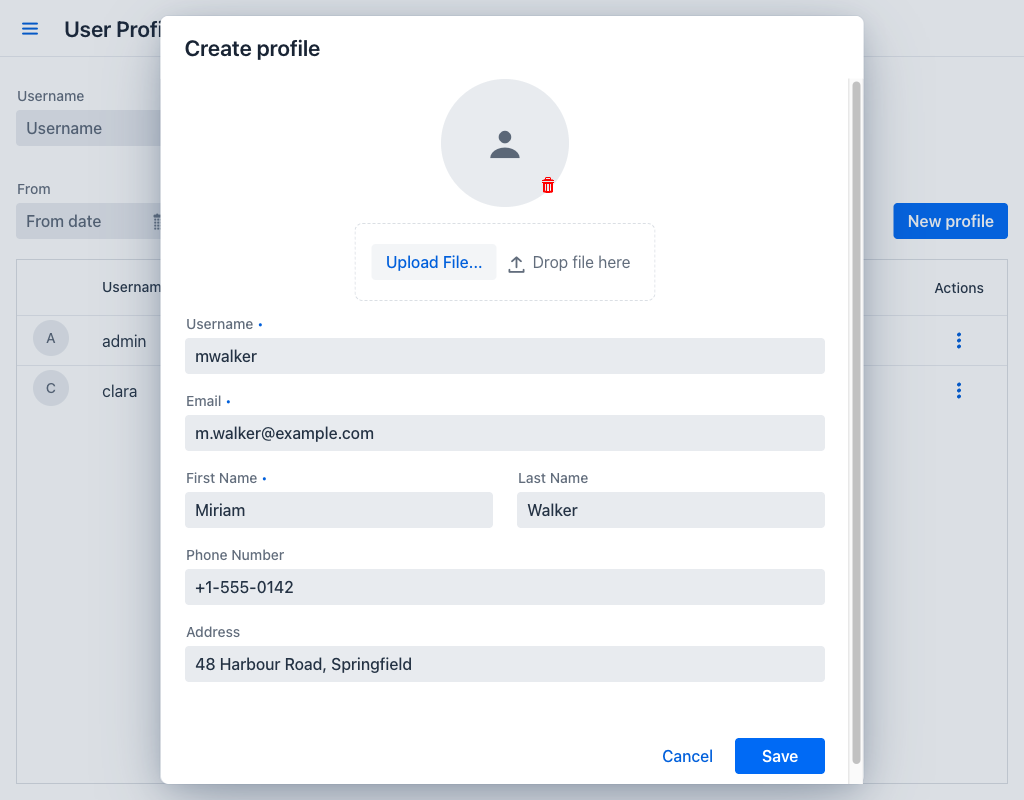
Fill in the profile fields (see Form Fields below) and click Save to create the profile, or Cancel to discard the operation.
Editing Profiles
To modify an existing profile, select Edit in the Actions menu of the corresponding row. This opens the Edit Profile dialog.
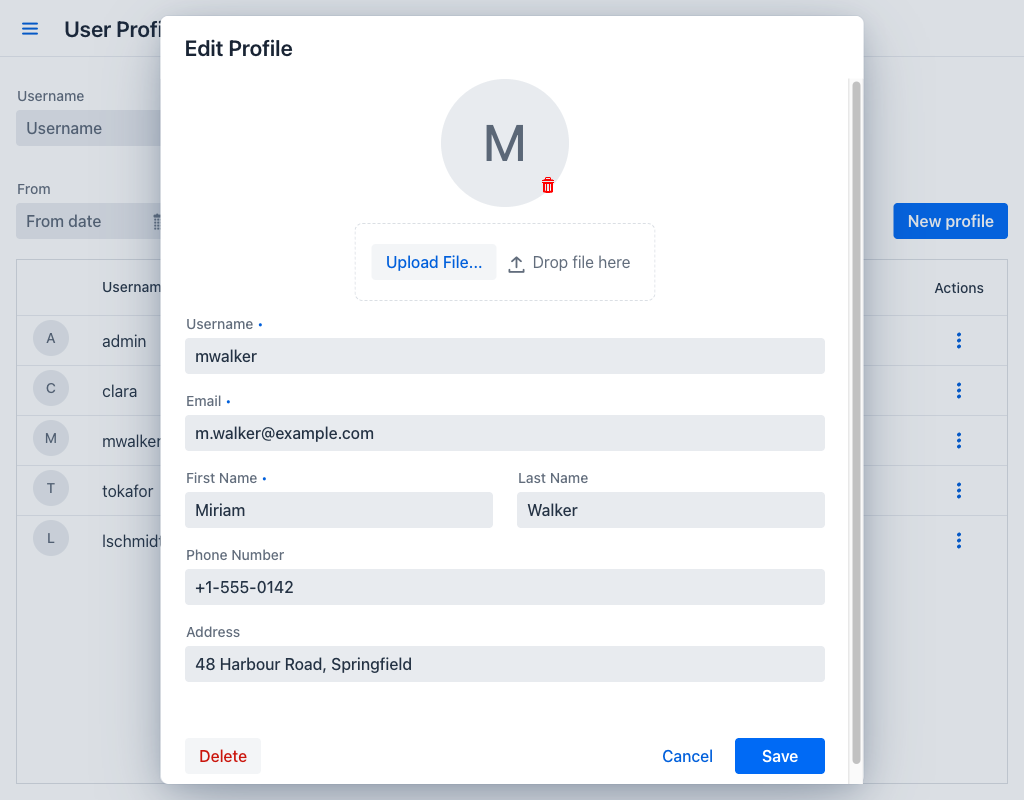
The edit dialog allows updating the user's information, including the Username, and provides a Delete button for removing the profile.
Click Save to apply changes, or Cancel to discard them.
Note
Changing the Username re-associates the profile with a different application user. The appjar does not verify that an account with the new username exists, but it does verify that no other profile already uses it.
Deleting Profiles
To delete a profile, select Delete in the Actions menu of the corresponding row. The same operation is available from the Delete button of the edit dialog.
The Delete profile dialog is displayed before the profile is permanently removed. Besides the confirmation question, it shows the Username and the Email of the selected profile as read-only fields, so that the profile about to be removed can be identified without going back to the grid.
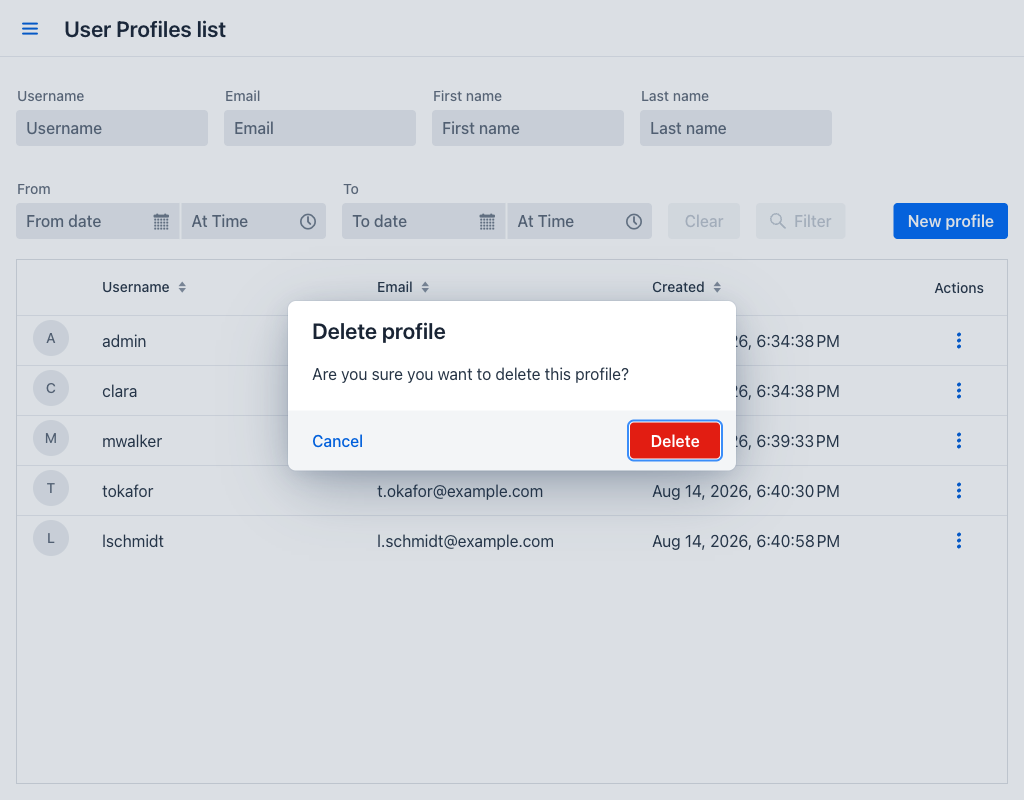
Click Delete to confirm, or Cancel to go back.
Warning
Profile deletion is a permanent action and cannot be undone.
Form Fields
The following fields are available in both the creation and edition dialogs:
- Username: Required. Must be between 4 and 50 characters and must not contain spaces. When the username contains an
@character, it must also be a valid email address. It must not be in use by another profile. Unlike the My Profile view, this field remains editable when updating an existing profile. - Email: Required. Must be a valid email address.
- First Name: Required. Must not be empty.
- Last Name: Optional.
- Phone Number: Optional.
- Address: Optional.
- Avatar: Optional profile picture. Supported formats are GIF, PNG, JPEG, BMP, and WebP (maximum size: 10 MB). After uploading, a circular crop dialog is displayed to adjust the desired area. Click Crop image to apply the selection, or Cancel to discard the upload.
A username identifies exactly one profile. When the Username entered is already taken, saving fails and the message "This username is already taken by another profile" is displayed at the bottom of the screen; the dialog stays open so that the value can be corrected. Length, spacing and email-format problems are reported on the field itself as soon as it loses focus.